Installing Awstats on a Media Temple grid-server (gs)
I’ve been using Media Temple for web hosting for a while. Like any other host, they have their advantages and disadvantages. One of the biggest problems with Media Temples is that their basic grid-server (gs) package only allows for very simple statistics gathering using Urchin. It is so simple that it combines hit counts from all websites into one graph unless users purchase additional grid-server units. Although Media Temple provides raw access logs, the way virtual hosts have been setup causes difficulty when attempting to use their logs with a log analyzer.
The following tutorial goes through how to install and configure the free and open source web statistics program Awstats to be used with Media Temple’s grid-servers to provide analytic data from the Apache logs per each individual domain.
This tutorial assumes that you have a Media Temple grid-server account. It also assumes you have some basic knowledge about using Linux including shell commands, shell scripting and editing files. You should also know how to use SSH and work with .htaccess files. If any of this is unfamiliar to you, you may want to start with installing Linux on a local computer or virtual machine and practicing basic shell commands and setting up a basic web server before continuing with this tutorial.
In a typical grid-server account, there is a symbolic link created in the primary user’s home directory called domains which points to a data directory containing all the individual domain’s document roots. For this tutorial, we’ll create a a WebApps folder within the domains folder, install awstats into that folder and configure it for each domain. We’ll then create the data directories, create symbolic links from each website to awstats, protect those directories and setup a cron script to updated the stats automatically. Let’s get started.
First you’ll want to SSH into your grid-server. Once there, create the directories needed for awstats, download the latest source code and then untar it. Finally, create a symbolic link to aid in easier upgrades further down the road.
ssh example.com
mkdir domains/WebApps
cd domains/WebApps
wget http://downloads.sourceforge.net/project/awstats/AWStats/6.95/awstats-6.95.tar.gz?use_mirror=softlayer
tar xvfz awstats-6.95.tar.gz
ln -s awstats-6.95 awstats
Awstatus uses it’s own file format to store statistics in. These files are created and updated by running Awstats against a set of Apache log files. Next, we’ll create the data directory and setup the configuration files. We’ll also move all the other web support files into into the cgi-bin directory, which will be necessary for correctly displaying the web statistics later.
cd awstats
mkdir data
cd wwwroot/cgi-bin/
mv ../classes ../css ../icon ../js .
Within this cgi-bin directory is the actual awstats.pl script. It’s used both to display the HTML stats page via a CGI interface and also to update the data files from the command line. Here is where you will create configuration files for each website.
The official installation documentation suggests using the command awstats_configure.pl located in the tools directory. It generates a configuration file and places it in the config directory, similar to the awstats.model.conf file located in the cgi-bin directory. It doesn’t matter which file you use as a template, but you must make sure the following attributes are set:
LogFile="/home/XXXXX/users/.home/scripts/mt_logfix.py example.com |"
LogType=W
LogFormat=1
LogSeparator=" "
SiteDomain="example.com"
HostAliases="example.com www.example.com"
DNSLookup=1
DirData="/home/XXXXX/domains/WebApps/awstats/data"
DirIcons="/awstats/icon"
DNSStaticCacheFile="dnscache.txt"
DNSLastUpdateCacheFile="dnscachelastupdate.txt"
Be sure to replace the XXXXX in this and other code examples with the number which leads to your home and data directories. The example.com should be replaced with your domain. The HostAliases should include any subdomains that you want included in this set of statistics. The other settings in the configuration file can be adjusted to your liking as well.
The file in the above example should be named awstats.example.com.conf and placed in the cgi-bin directory. Additional domains will need their own configuration file, placed in the same directory with the same naming convention.
You’ll notice in the above configuration file, there is a reference to mt_logfix.py. The trouble with the standard Apache logs for the way Media Temple sets up their grid-server is that it places the domain name for the virtual host in the actual path of each log entry. For example:
xxx.xxx.xxx.xxx - - [29/Oct/2009:12:08:24 -0700] "GET /example.com/somepage.php HTTP/1.1" 200 1232 "-" "Mozilla/5.0 (compatible; Googlebot/2.1; +http://www.google
.com/bot.html)"
The following python script extracts all the log entries for one particular website and removes the name of the virtual host from path. It uses the logresolvemerge.pl script that comes with Awstats to combined all the log files and process them sequentially. Awstats is designed so that it can process the same log file(s) multiple times by skipping over all the previous recorded entries, so you don’t need to keep track of which files you’ve processed. I’ve placed this file in a directory called scripts under my home, but you can place this anywhere you like, just be sure to adjust the configuration file(s) you created previously accordingly. Also be sure to set the two initial variables in the script to the correct path.
#!/usr/bin/env python

mergecmd = '/home/XXXXX/domains/WebApps/awstats/tools/logresolvemerge.pl'
logfiles = '/home/XXXXX/logs/access_log*'

import sys
import re
from subprocess import Popen, PIPE, STDOUT

#check for domain argument
if len(sys.argv) != 2:
  print '\nMT LogFix\n\nUsage: ./mt_logfix.py <domain>\n\n\tSumit Khanna - PenguinDreams.org\n'
  sys.exit()

domain = sys.argv[1]

#open logresolver
pipe = Popen([mergecmd,logfiles],stdout=PIPE,stdin=PIPE,stderr=STDOUT)


#filter for domain
for line in pipe.stdout:
   if re.search('GET /'+domain+'/',line) :
     print re.sub('GET /[a-z.]*/', 'GET /', line).strip()
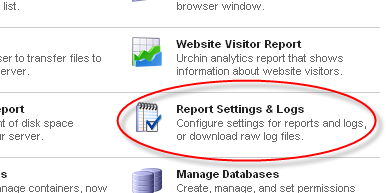
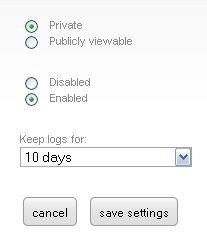
For this to work, logging must be enabled for your grid-server. To do this, login to the Media Temple account center, click on your server and go to the section titled “Report Settings and Logs.” Be sure the that the “Keep Logs For” drop down has a value in it. I would suggest keeping it at the maximum unless you start to run out of space. At a minimum, you must keep this setting higher than the cron settings you’ll establish for the batch script later so that no log data is lost.


Next, setup the batch process to run Awstats at regular intervals and update our database files with the latest Apache logs. I created a simple script and placed it in the scripts directory located in my home directory. Be sure to adjust the path and domains.
#!/bin/sh

SCMD="/home/XXXXX/domains/WebApps/awstats/wwwroot/cgi-bin/awstats.pl"

domains="example.com example.net example.org"

for i in $domains; do
  $SCMD -config=$i
done
It would be nice if we could just schedule the above script to run through cron. Unfortunately running the above script via cron on Media Temple produces the following results
Create/Update database for config "/home/XXXXX/domains/WebApps/awstats/wwwroot/cgi-bin/awstats.example.com.conf" by AWStats version 6.9 (build 1.925)
From data in log file "/home/XXXXX/users/.home/scripts/mt_logfix.py example.com |"...
Phase 1 : First bypass old records, searching new record...
Searching new records from beginning of log file...
Jumped lines in file: 0
Parsed lines in file: 0
 Found 0 dropped records,
 Found 0 corrupted records,
 Found 0 old records,
 Found 0 new qualified records.
None of the log files are read and none of the data files are written. It would seem like a permission issue, however the cron scripts should run under the same permissions as your user account. I wrote the following script and ran it both through cron and through SSH.
#!/bin/sh

echo -e -n "Who:\t"
whoami
echo -e "Home:\t$HOME"
echo -e "UID:\t$UID"
echo -e "EUID:\t$EUID"
echo -e "User:\t$USER"
Here are the results running the script via SSH:
Who:    example.com
Home:   /home/XXXXX/users/.home
UID:    4----9
EUID:   4----9
User:   example.com
And here is the output of the same script when run via cron:
Who:	example.com
Home:	/home/XXXXX
UID:	4----9
EUID:	4----9
User:
It’s important to note that although the username is the same, the home directory when running the script via cron is incorrect. Furthermore, the $USER shell variable is not established. Clearly the cron shell is running in a very different mode than a standard login shell, possibly due to security restrictions or certain patches for a hardened environment. A less than elegant solution is to establish a set of keys for SSH and have the cron script ssh to the local host and run the generation script. To do this, create a script called generate_stats_ssh_fix.sh and place it in the scripts directory you created earlier.
#!/bin/sh

echo "Using SSH Hack:"
ssh -F /home/XXXXX/users/.home/.ssh/config -i /home/XXXXX/users/.home/.ssh/id_dsa localhost "/home/XXXXX/users/.home/scripts/generate_stats.sh"
In order for this script to work in cron, ssh must be able to login to the local machine without needing a password. Therefore it is necessary to create a DSA authorization key set and add the generated public key into the local authorized key store. If you are all ready familiar with SSH keys, this should make sense to you. If you don’t and have never setup any of the configuration files within the .ssh directory on your webserver before, then simply run the following:
ssh-keygen -t dsa #press enter for all questions which will select the default answers
cat ~/.ssh/id_dsa.pub >> ~/.ssh/authorized_keys
ssh localhost #type yes when prompted to add the key fingerprint
If you don’t understand what is going on here, please read up on SSH keys and authorization to fully understand the security implications presented. Normally you would create a set of SSH keys and add the public key to a remote server’s authorized key store in order to SSH to it without needing a password. Here we are essentially doing the same thing, except we are connection to our local machine. We preform the connection once to add the local machines fingerprint into the known_hosts file.
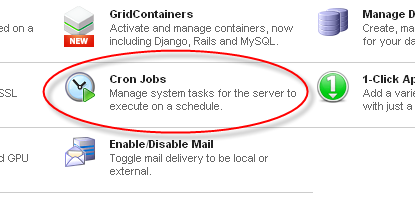
Next, we take this SSH wrapper script and create a cron task out of it. In the account center, navigate to the cron section and add the generate_stats_ssh_fix.sh script as a new job. I would suggest setting up the notification e-mail initially to make sure the task is running correctly. After you’re sure it’s going, you can remove the e-mail from this field. The schedule time is up to you. I’d suggest running it once per day.


Now that we have have log collection taken care of, we need to work on displaying the results. We can do this with the awstats.pl script. Let’s start by creating a .htaccess file within the /home/XXXXX/users/.home/domains/WebApps/awstats/wwwroot/cgi-bin directory:
AddHandler cgi-script .pl
Options +ExecCGI

AuthName "Restricted Area"
AuthType Basic
AuthUserFile /home/XXXXX/domains/WebApps/awstats/wwwroot/cgi-bin/.htpasswd
AuthGroupFile /dev/null
<LIMIT POST GET>
  require user someuser
</LIMIT>
With this .htaccess file, we’re doing two things. The first is granting this directory permissions to execute CGI scripts. The second is restricting access based on an .htpasswd file. In the above example I place the password file within the same directory as the CGI script, but for security you may want to move it to some other location out of your web accessible folders.
Information on creating the actual .htpasswd file can be found in the Password Protecting Directories article in Media Temple’s knowledge base.
Finally, we can create the symbolic links to our statistics pages.
cd /home/XXXXX/domains/example.com/html/
ln -s /home/XXXXX/domains/WebApps/awstats/wwwroot/cgi-bin/ ./awstats
You can create this link for each domain you’ve created configuration files for. Once created, you should be able to navigate to http://example.com/awstats/awstats.pl, enter in the username and password you established earlier with the .htaccess and .htpasswd files, and view the analytics for that particular domain.
Congratulations. You should now have Awstats setup on your Media Temple grid-server account. To add new domains, simply create a new configuration file and update the generate_stats.sh script. To upgrade to a newer version of Awstats, untar the newer version in the WebApps directory, copy over the data and configuration files and adjust the symbolic link. Although the example presented is for Awstats, the mt_logfix.py can be used to get the Apache web server logs in the correct format for many other log file analysis based analyzers.
Awstats is a decent free analytics tool. Although not as powerful as commercial solutions, it is much better than the horrid Urchin tool provided by Media Temple. Most other web hosting providers have an installation of Awstats in their basic packages. Although the process for installing it yourself with Media Temple is a bit cumbersome, it is worth it. Media Temple does have awstats installed on their dedicated virtual (dv) solutions, and hopefully they will eventually add this application into their grid-server account center, removing the need for this manual installation.
Comments
Hello, just want to compliment you for on this great tutorial. Though my attempt was not successful but I am sure i have made some mistakes along the road since I'm not too familiar with the process. If its possible could you personally give some guidelines? I have followed the tutorial thoroughly but not sure what the problem is. When I go to awstats page it doesn't not seem to be collecting the data. If you can point me to what i have done wrong and where the data collecting issue can occur then it would be much appreciated.
Thanks
this has been great thank you. I have a few questions, and will post them on the (mt) forum