Lineage with microG on a Sony XA2
I’ve owned a lot of smart phones. I started off in the PalmOS world and have been solidly in the Android camp for the past several years. Although I’ve used a lot of custom ROMS, I typically still install Google Apps and services. As my concerns over privacy have grown, I’ve started looking at microG, a bare-bones implementation of Google Services that limits personal and location information being continually sent to Google. I purchased a Sony XA2 a few years ago as a backup device, and decided to try out the Lineage for microG project on this device. Although flashing a new operating system on a phone should be a common affair by this point, I ran into issues that left me digging through forum threads for help. Hopefully documenting the errors I encountered, and my solutions, will help others with similar devices.
Unlocking a Sony Phone
All but one Sony phone I’ve owned had an unlockable bootloader. The official instructions for unlocking a Sony bootloader are comprehensive. You will need to enter your device’s IMEI number into the Sony website to get an unlock code. You will also need to enable the developer options on your phone by going to the system menu, tapping About Phone and tapping on the Build number repeatedly until developer access is granted. Next, you’ll need to go into System > Advanced > Developer options and enable OEM unlocking.
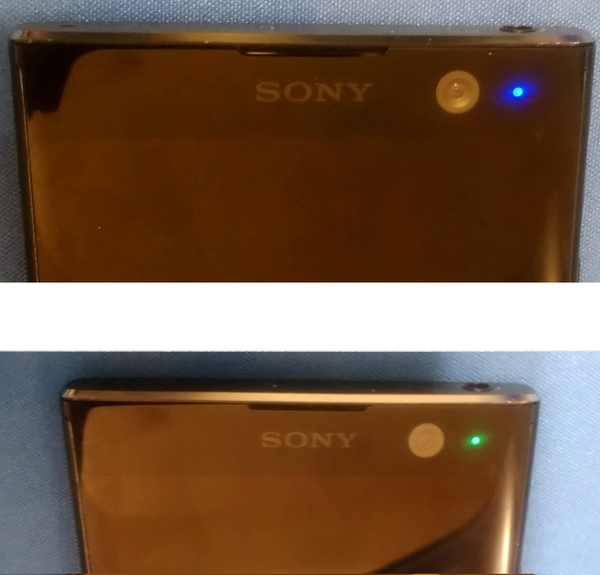
You’ll need to reboot your phone in fastboot mode. The method to do this varies by vendor. For Sony devices, most of them enter fastboot by powering them off and then plugging in the USB cable while pressing the volume up button. Be sure to check the Sony documentation on their unlock page to see what it is for your device. Once the blue LED appears, fastbook devices should show your phone in the list. Running fastboot oem unlock <unlock code> will unlock the device. The phone will then wipe and reset itself, after which you can now install a custom ROM.
If you get the error Command not authenticated, be sure you see a blue LED to ensure your phone is in fastboot mode. If you see a green LED, it means you held the incorrect volume button. In this mode, the phone can only be flashed with official firmware1.
TWRP
Newer Android devices have moved to a/b slots for booting. This allows for updates that can be applied and rolled back. I typically use TeamWin Recovery for installing custom ROMs. Once your phone is unlocked, you can download the TWRP recovery image for your device. You can either use fastboot to boot it over USB, without installing it to a recovery partition (recommended), or write it to one of the boot slots. If you flash TWRP and then install Lineage, Lineage typically installs its own recovery. I found that if I installed TWRP to slot a, Lineage installed and flipped the bootloader to slot b. Later on, we’ll be patching the Lineage boot image with Magisk anyway, which will be required to have admin rights (root) on your device.
# You can get and set the current slots using the following commands

fastboot getvar current-slot
current-slot: b
Finished. Total time: 0.001s

fastboot --set-active=a
Setting current slot to 'a'                        OKAY [  0.055s]
Finished. Total time: 0.056s
Many guides recommend running flashboot boot twrp-3.5.2_9-0-pioneer.img, allowing TWRP to run one time without being installed. If you insist on installing TRWP to one of the boot slots, you may see a partition size error.
fastboot flash boot twrp-3.5.2_9-0-pioneer.img
fastboot: error: cannot get boot partition size
If you encounter this error, you may need to set the raw parameter2. It should write to the slot you’ve selected with the --set-active flag shown in the previous example.
fastboot flash:raw boot twrp-3.5.2_9-0-pioneer.img
Sending 'boot_a' (23069 KB)                        OKAY [  0.608s]
Writing 'boot_a'                                   OKAY [  0.000s]
You can then use the fastboot command to reboot in recovery mode.
fastboot reboot recovery
Rebooting into recovery                            OKAY [  0.000s]
Finished. Total time: 0.050s
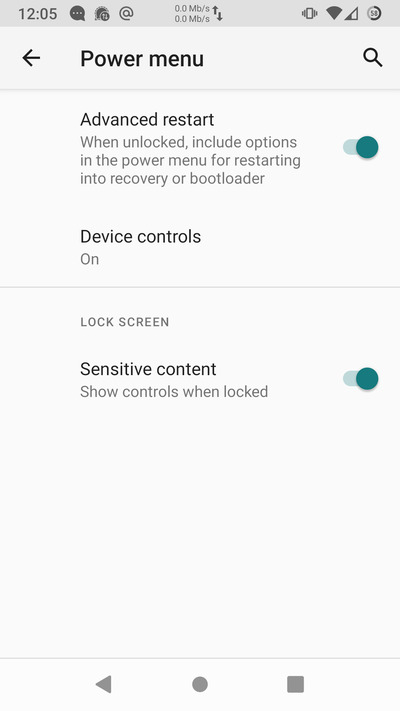
On some attempts, this command would indicate it completed successfully but the phone wouldn’t actually reboot into recovery. On older versions of Android, advanced reboot options can be enabled from developer options. On more recent releases, it has been moved to Options > System > Advanced > Gestures > Power Menu. Once enabled, holding the power button and then tapping reboot will give additional options for booting into recovery or the bootloader.
Lineage + microG
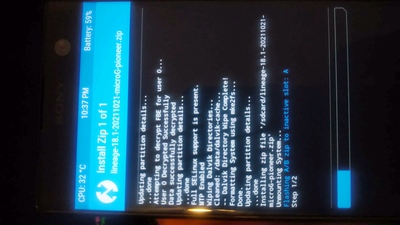
In the past, I’ve attempted to use microG directly on an official build of Lineage via F-Droid. This will fail due to microG requiring an operating system patch for signature spoofing, which the LineageOS developers do not want to include3. Lineage for microG is a fork of Lineage with microG and F-Droid patched directly into the base image. Flashing Lineage for microG is fairly straight forward using TWRP. I simply wiped my system, data and cache, pushed the new ROM via adb push while the device was in recovery mode, and then flashed it using TWRP.
adb push lineage-18.1-20211007-microG-pioneer.zip /sdcard
lineage-18.1-20211007-microG-pioneer.zip: 1 file pushed, 0 skipped. 28.9 MB/s (695754541 bytes in 22.934s)
Magisk
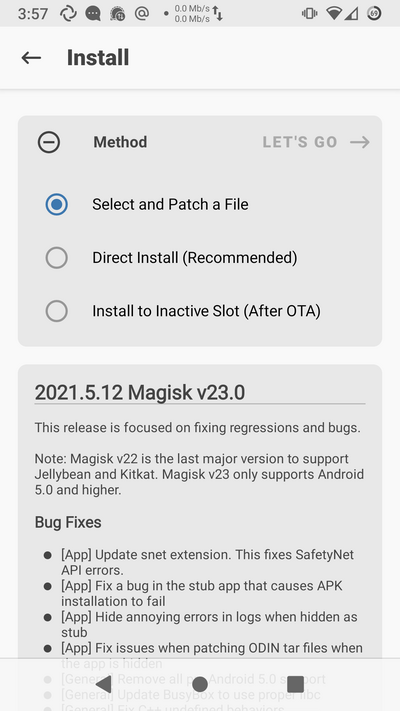
I initially made the mistake of trying to install Magisk by just flashing their zip file to the system partition via TWRP. Do not do this or else your phone will enter a boot loop. The official documentation for Magisk indicates you need to install the app/apk file first, and then use Magisk to patch your ROM’s boot image4. On the Lineage 18.1 image, the zip file doesn’t contain an individual boot.img. Instead it contains a payload.bin, from which you need to extract the boot partition5. This can be done using the Payload Dumper python script by ius (mirror6).
# Unzip the payload.bin from your ROM file
unzip lineage-18.1-20211007-microG-pioneer.zip payload.bin

# This will create a boot and system image file
python3 payload_dumper.py payload.bin
Reboot into your system and use adb to push the boot file onto your phone.
adb push boot.img /sdcard
boot.img: 1 file pushed, 0 skipped. 18.6 MB/s (23339008 bytes in 1.197s)
You can then select this image file in the Magisk app in order to patch it.
Use adb pull to retrieve this file. Reboot into fastboot mode and flash it to your boot partition.
fastboot flash:raw boot magisk_patched-23000_E0SRF.img
Sending 'boot_b' (23069 KB)                        OKAY [  0.608s]
Writing 'boot_b'                                   OKAY [  0.000s]
Finished. Total time: 0.623s
Now if you reboot, the Magisk app should indicate that Magisk is installed. You should now have administration rights (root) on your phone. This is useful for tools such as Ad Away, the Aurora Store and many others.
Aurora App Store
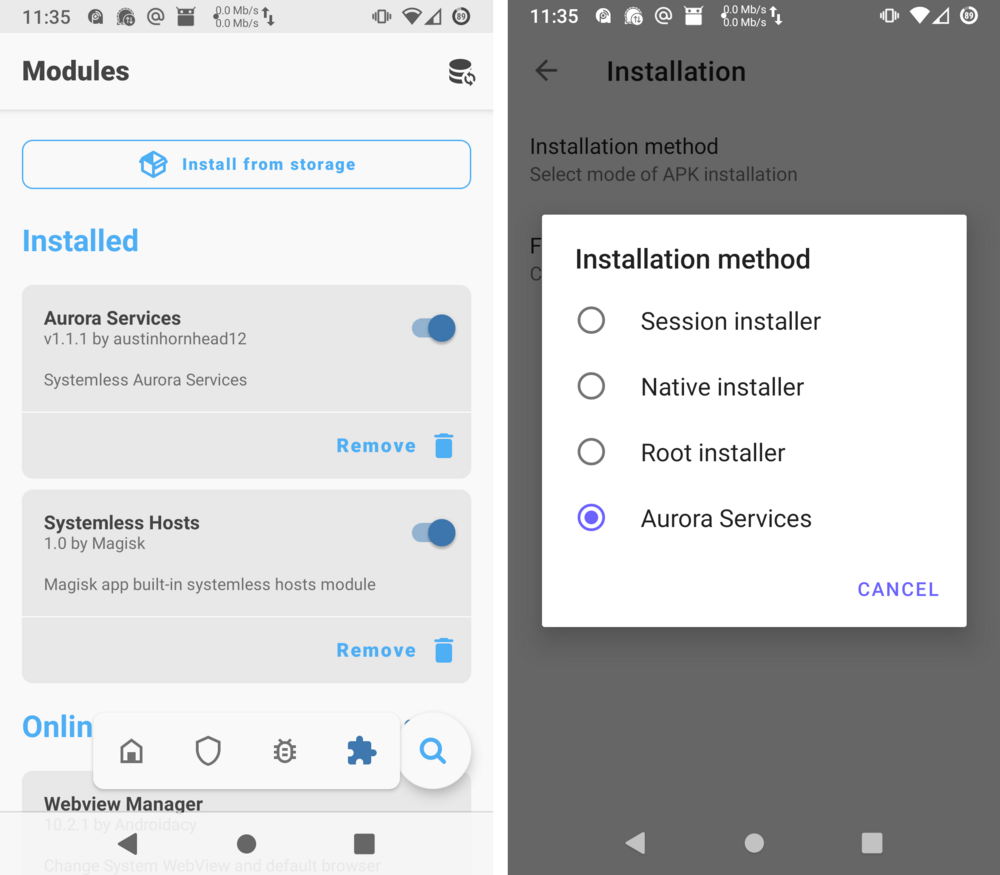
The Aurora store is available in F-droid and allows you to install Google Apps without using the Play store or related Google services. Although I’ve paid for a few apps in the past, there are no paid apps I currently use via Google Play. There is an Aurora background service which can be installed via Magisk, and it allows for increased transparency in background application installation and updates.
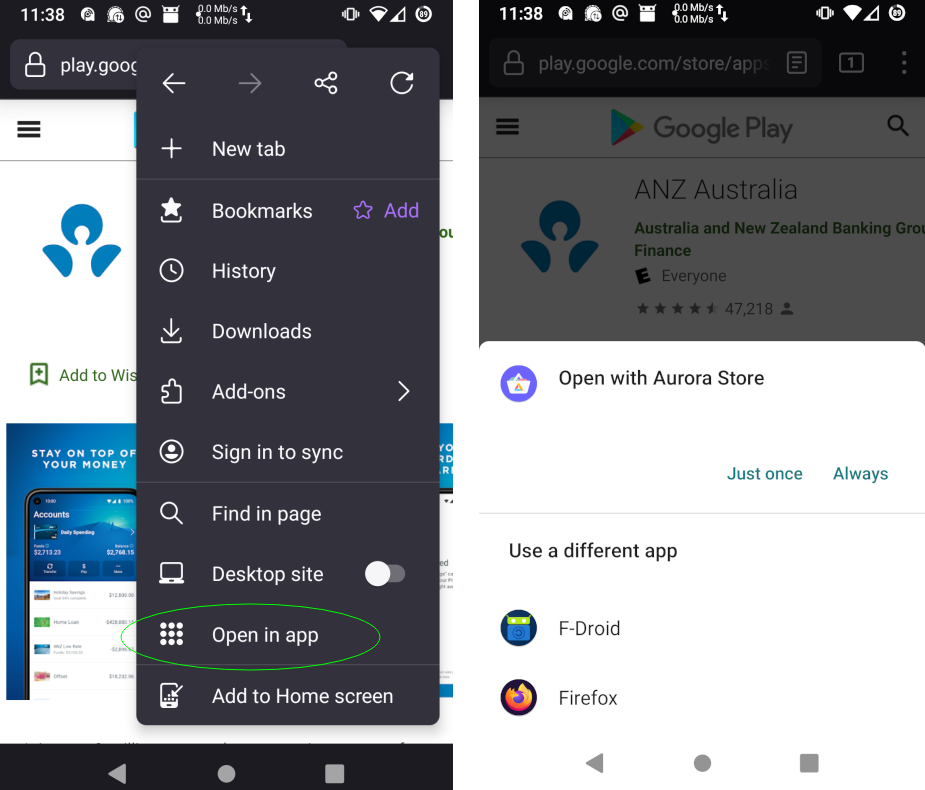
There were some applications I had trouble finding via the Aurora Store search. If you run into this difficulty, you can go to the apps page in a web browser and then open it via the Aurora app.
Closing Thoughts
I had a few hickups with the installation and rooting process. Yet now that I have Lineage with microG and Magisk running, the phone is usable and almost identical to my standard Android experience. Most of the apps I prefer to use these days are in F-droid. There are a few closed source applications I prefer, and so far I’ve been able to install them either via Aurora or the Amazon App store without issue. I’ve been using the XA2 as my main device for a few weeks, and will eventually install Lineage with microG on my primary phone as well.
I’m not an open source purist. I have known people in the past who have run Android with only F-droid apps, in an attempt to limit the amount of closed source software they used. One told me she finally went back to Gapps because she was tired of writing apps to make up for the tools she was missing.
My reasons for switching to Lineage with microG have more to do with privacy, tracking and limiting the amount of data the big tech companies collect about me. Being able to tell people I run a phone without any Apple or Google services, is important to me. It’s a small community of developers that build, maintain, test and support the tools I’ve covered. Individually, it would be very difficult to build and test all these components. Yet together, enthusiasts have been able to take the bastardization of open source that is the Android Open Source Project (AOSP) and turn it into a usable operating system; A phone that returns control to the device owner, and protects personal privacy.
-
issue with fastboot. 23 September 2019. j4nn. XDA Developers ↩
-
fastboot: error: cannot get boot partition size. 30 November 2020. Isrhad. Stackoverflow. ↩
-
FAQ - Lineage for microG. Retrieved 21 October 2021. ↩
-
Installation - Magisk. topjohnwu. Retrieved 17 October 2021. ↩
-
How to Extract Android OTA Payload.bin File using Payload Dumper Tool on a PC or Android Device. 28 November 2020. Bhardwaj. TCD. ↩
-
Payload Dumper Tool by ius. 29 December 2017. (Google Drive Mirror) Retrieved 17 October 2021. ↩