Installing Void Linux with a Serial Terminal
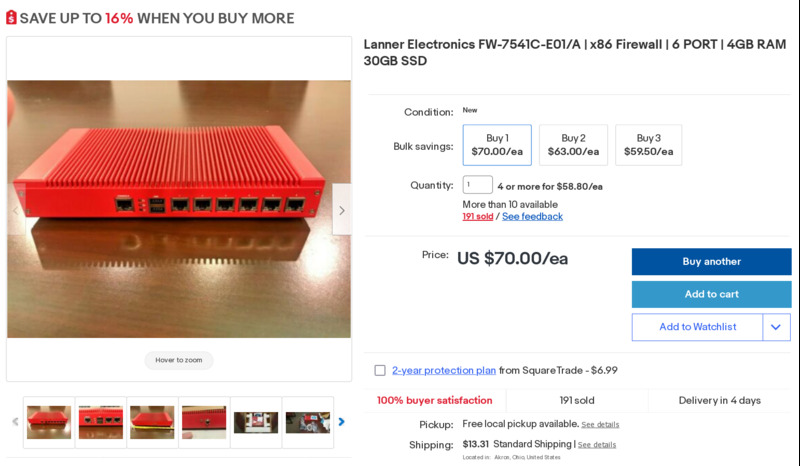
I recently picked up a Lanner FW-7541C off eBay for $88.31 (including shipping). This industrial device has a 2-core/4-thread Atom D525 processor, a 30GB SATA SSD, 4GB of DDR3 ram and six independent Intel gigabit Ethernet adapters. It’s a well built little device I bought to replace my custom Linux router. However, it has no video output ports. It took some work, but I was able to setup and install Void Linux on this device using the serial port console. This guide goes through building the installation media with the custom parameters needed for a serial console. It also goes through the post installation steps that will keep a login prompt active on the serial port after install.
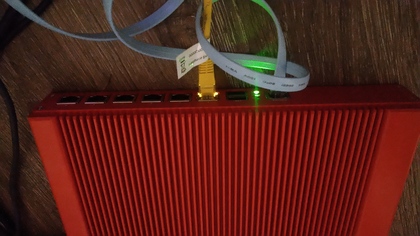
The serial port on this device comes in the form of an RJ-45 connector. Although the device comes with an RJ-45 to RS232 cable, none of my computers has a classic serial port. These types of serial connectors are common on a lot of networking equipment, and I was able to get a USB-to-RJ45 serial cable off of eBay for $13.77 (including shipping). This cable works with the standard ftdi_sio in the Linux kernel, and shows up as /dev/ttyUSB0.

Minicom is an open source serial client that will work with these adapters by running minicom -D /dev/ttyUSB0. Although the BIOS and PXE boot screens will show up over the serial port, bootloaders and the Linux kernel need additional configuration to route their input/output to a serial console.
At first I thought I could mount the Void live USB image and modify the bootloader settings. However, the primary boot filesystem is non-modifiable (iso9660). Rather than attempt to modify the release image1, I used the void-mklive project, which the Void team uses to make their installation images. This project does need to be run on a Void Linux system, as it runs several Void specific commands. The build script takes a kernel command line option, which can be used to specify serial console options2. In the following block, the console=ttyS0,115200n8 kernel parameter will open a boot console running at 115200 bps, with 8 bits and no parity (a common serial configuration).
git clone https://github.com/void-linux/void-mklive
cd void-mklive
make
sudo ./mklive.sh -C "console=ttyS0,115200n8"
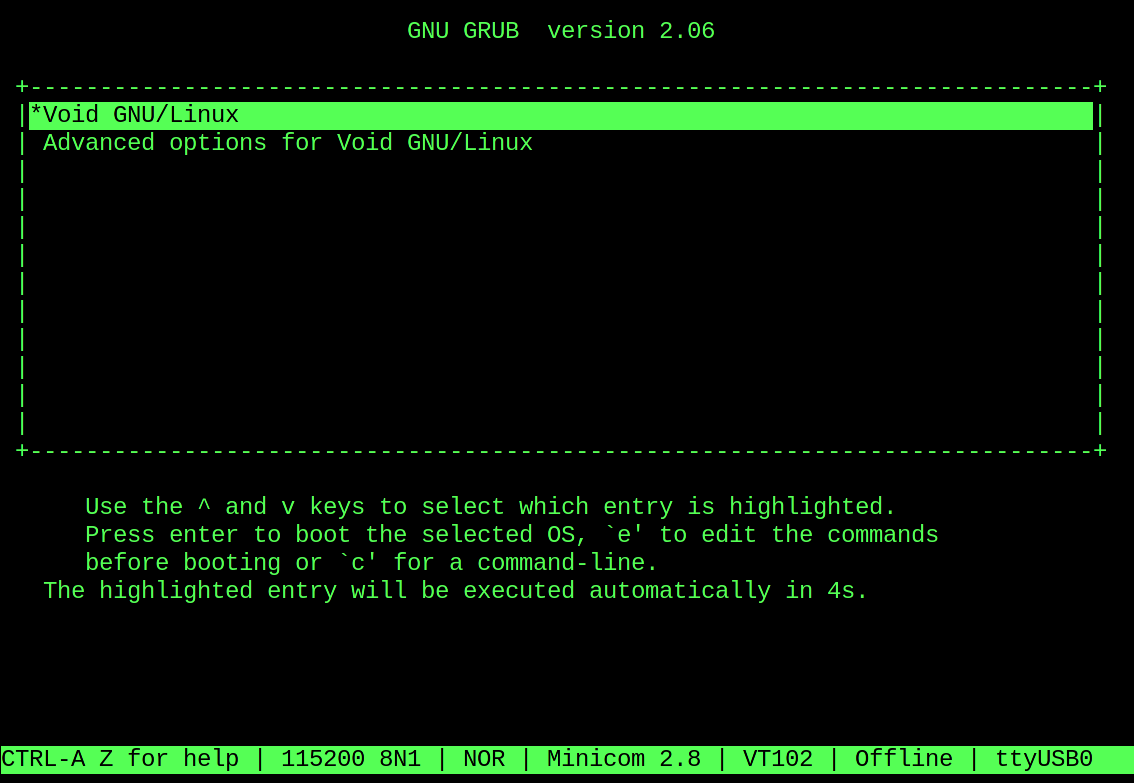
The FW-7541C is old enough that it only works in BIOS mode. If you’re using a device that boots using UEFI and would like to see the GRUB screen over the serial port as well, you can add the following lines to grub/grub_void.cfg.in3 prior to running mklive.sh:
insmod serial
serial --speed=115200 --unit=0 --word=8 --parity=no --stop=1
terminal_input serial
terminal_output serial
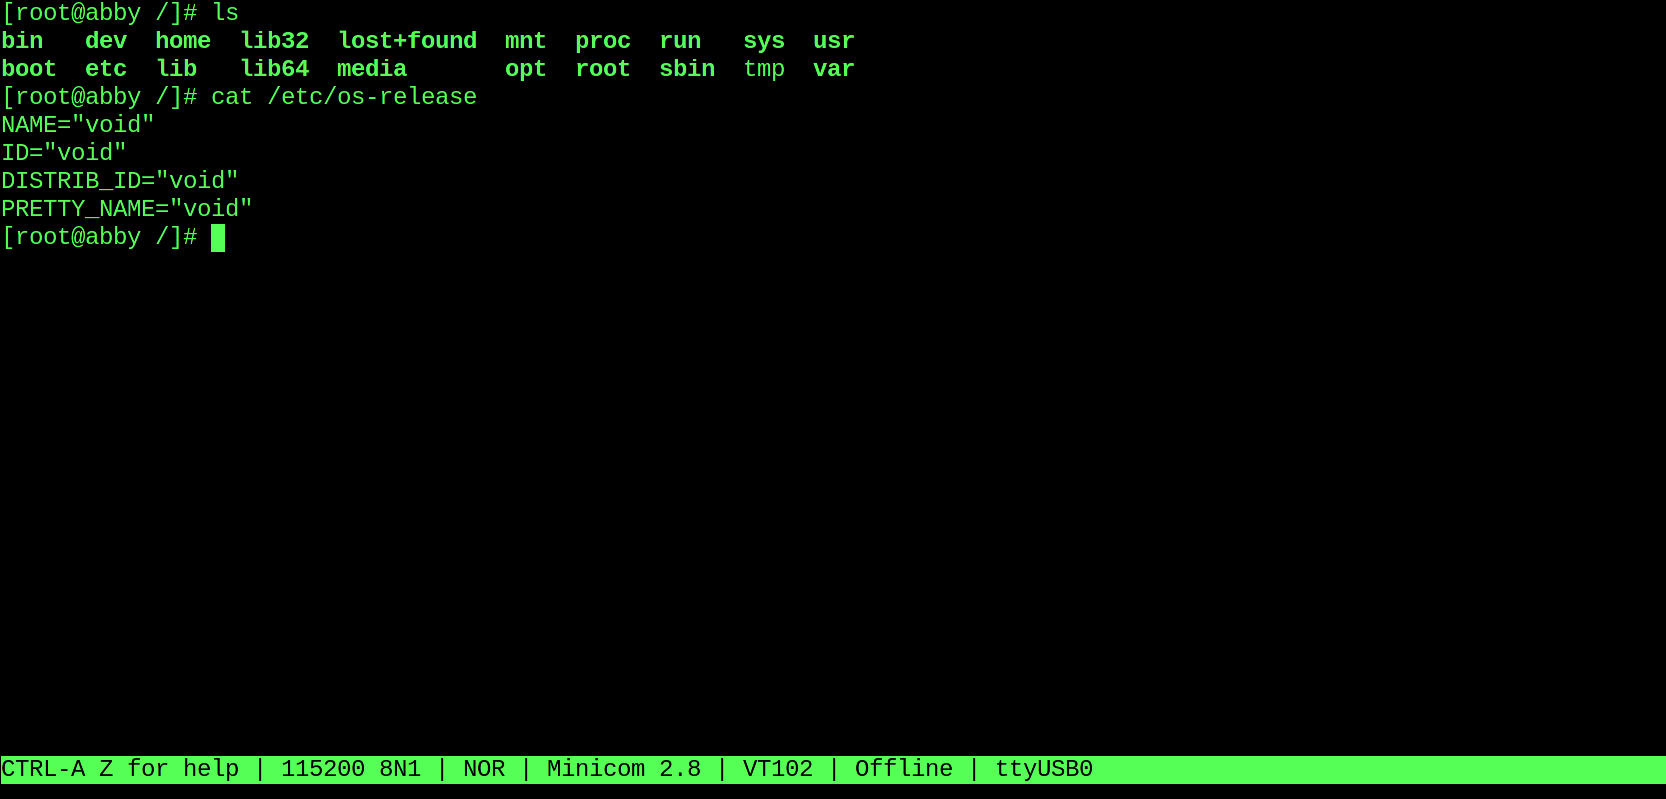
After using dd to create a USB stick with this image, I was able to see Void loading up over the serial port. From here, it’s just a standard x86_64 machine. I was able to use the void-installer command to install Void Linux. It’s important to not reboot after the installation is complete, as there are additional steps needed to ensure the new system will be able to use the serial console. The following steps assumed the operating system was installed to /dev/sda1
# Mount the device you installed Void to
mount /dev/sda1 /mnt/target

# We need these for the GRUB installer
mount --rbind /dev /mnt/target/dev
mount -t proc none /mnt/target/proc

# In case you need DNS for networking
cp /etc/resolv.conf /mnt/target/etc/

# Switch into our new install
chroot /mnt/target

# Enable the serial console
ln -s /etc/sv/agetty-ttyS0 /etc/runit/runsvdir/default
Normally to enable a service on Void Linux, you’d create a symbolic link in /var/services. However, we’re in a system where Void hasn’t booted yet, so the /var/services symbolic link to the current runlevel hasn’t been created. You can also create a symbolic link for sshd if you’d like that started at boot as well. If you want to see and control the GRUB console during the boot process, you’ll also need to add the following to /etc/default/grub4.
GRUB_CMDLINE_LINUX_DEFAULT="loglevel=4 console=ttyS0,115200n8"
GRUB_TERMINAL=serial
GRUB_SERIAL_COMMAND="serial --speed=115200 --unit=0 --word=8 --parity=no --stop=1"
Be sure to run grub-update, umount the file system and reboot the system.
update-grub
exit
umount -R /mnt/target
reboot
If everything goes correctly, the boot and login sequences should be available within minicom.
Void uses the runit system for launching services and terminals. If you go with a Linux distribution that uses systemd, instead of the symbolic link for agetty-ttyS0, you’ll need to run systemctl enable serial-getty@ttyS0.service to enable a serial port login console. For distributions that use OpenRC or another system v based init system, the serial console can be enabled by editing /etc/inittab.
The Device
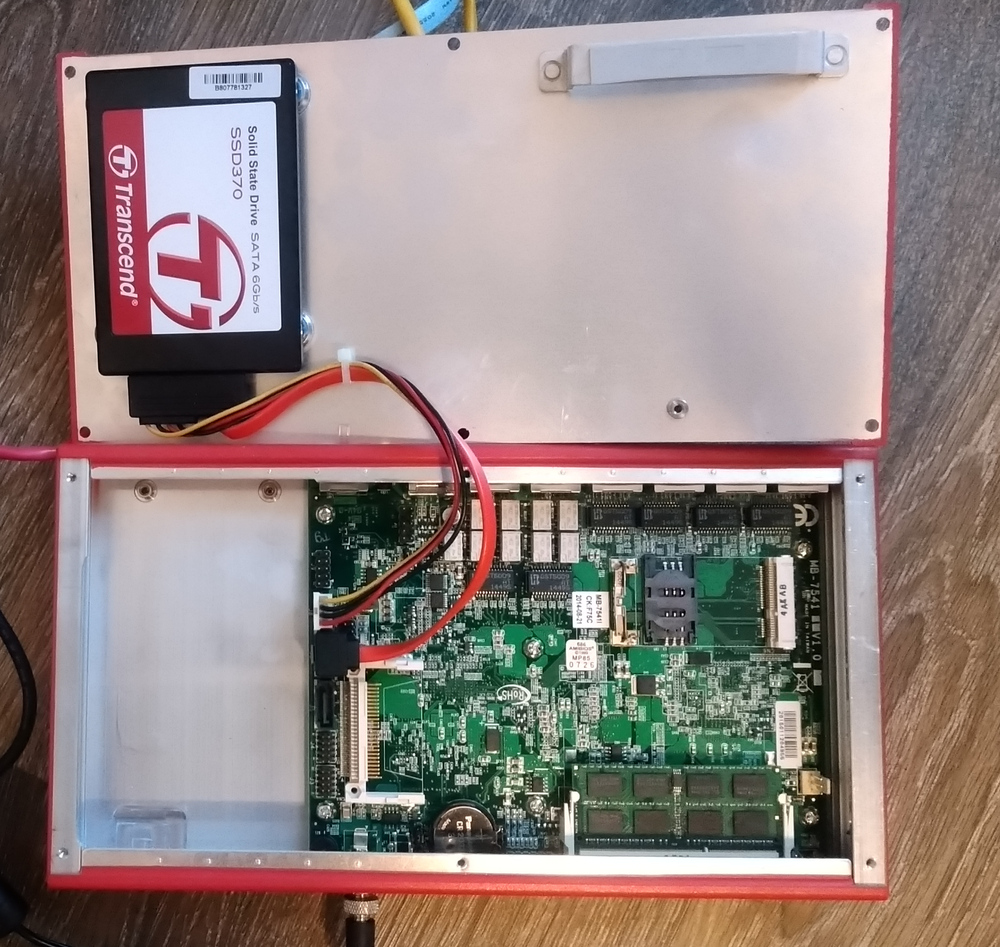
This is a pretty well built device. Based on the hardware5 and product manual6, it appears this device originally came out between 2010 and 2012. Although there is a fan header, it’s passively cooled, using the case as a heat sink. There appears to be a video header on the board itself that could be attached to a VGA display. Unlike previous router hardware I’ve used, each Ethernet port is on its own dedicated adapter. Unlike newer and more expensive devices I’ve tried, all the hardware worked out of the box.
There is a Mini PCI-E connector, as well as two indents that can be pushed out, to add a Wi-Fi card and antennas. Although there is a SIM card slot, it does require adding a PCI-E card to be usable.
Final Thoughts
As I write this, I’ve been using this device as a replacement for my previous Thin-ITX router. I’m currently handling Wi-Fi via an external Wi-Fi 6 access point. Overall, this device has a higher build quality and is more affordable than my previous custom router build. It’s been a long time since I’ve booted and logged into a Linux system over a serial console, but I’m glad it’s still possible (although with a little work) with modern bootloaders and kernels.
-
Installing Debian over a serial console. 23 April 2020. Pircher. ↩
-
Linux Serial Console. Linux Kernel Documentation. Retrieved 26 September 2021. ↩
-
getting boot messages through a serial line. 3 March 2019. Opopop. ↩
-
Using a Serial Console with Linux, GRUB, SysLinux + Understanding Serial Configuration . Privex. Retrieved 26 September 2021. ↩
-
Intel Atom Processor D525 Product Specifications. Intel. Retrieved 25 September 2021. ↩
-
LANNER FW-7541 USER MANDUAL Pfd Download. ManualsLib. Retrieved 26 September 2021. ↩